Table of Contents
ToggleTiny homes, typically under 500 square feet, aren’t just a trend: they’re a practical solution for DIY homeowners looking to reduce costs, simplify living, and build smarter. The challenge isn’t the size: it’s the layout. A poorly planned tiny home feels cramped and dysfunctional, while a well-designed one flows effortlessly and accommodates everything a full-sized house does. Whether you’re designing a new tiny home from scratch, planning a renovation, or rearranging a studio apartment, layout decisions determine how livable and enjoyable the space truly becomes. This guide walks through proven strategies, open concepts, multifunctional furniture, smart storage, and visual tricks, that let you maximize every square foot without feeling squeezed.
Key Takeaways
- A well-designed tiny home layout maximizes every square foot by combining open-concept design, smart storage, and strategic zoning without feeling cramped.
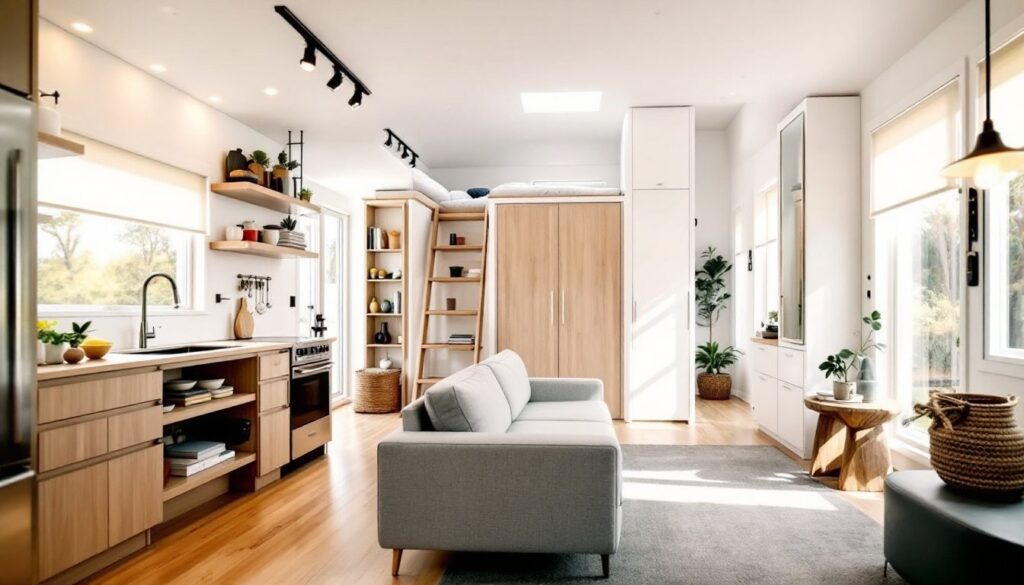
- Open-concept kitchens with low bars or peninsula counters maintain sightlines and flow in tiny home layouts while preserving subtle functional boundaries.
- Multifunctional furniture and custom built-ins that align with your exact footprint are more practical than novelty items like murphy beds that don’t fit your daily routine.
- Vertical storage, labeled zones, and underbed rolling bins prevent clutter overflow and transform a tiny home layout from chaotic to organized.
- Layered lighting, light-neutral wall colors, mirrors, and flooring transitions make tiny homes feel larger while creating distinct zones for work, sleep, and relaxation without walls.
Understanding Tiny Home Basics
Before diving into layout tricks, nail down what you’re working with. A tiny home under 400 square feet has roughly 25–30% of a standard 1,500-square-foot house. That math means every wall, doorway, and corner serves double duty.
Start by measuring your actual footprint, length and width in feet. Note ceiling heights, window locations, and fixed elements (kitchen plumbing, electrical panels, HVAC ducts). These don’t move and will anchor your layout. Ceiling height matters: vaulted or 9-foot ceilings feel less claustrophobic than a standard 8-foot drop, though tiny homes often use 8-foot or lofted areas over living spaces.
Identify load-bearing walls before moving anything. In most residential framing, exterior walls and central beams carry roof load. Removing or altering a load-bearing wall requires a structural engineer and a permit, not a DIY move. Non-load-bearing walls (typically those running perpendicular to joists or between rooms) can be relocated if you remove electrical, plumbing, and HVAC first.
Zoning codes vary by region, but most jurisdictions require a minimum ceiling height of 7 feet in at least 50% of a habitable room, a bedroom at least 70 square feet with a minimum width of 7 feet, and a kitchen with accessible countertop and cabinet space. Check your local codes before finalizing the layout.
Open-Concept Design Strategies
The most transformative shift in tiny home design is removing interior walls to create an open-concept flow. Combining kitchen, dining, and living areas eliminates visual and physical barriers that make small spaces feel segmented and cramped.
Keep the kitchen separate only if cooking odors bother you: otherwise, a galley-style kitchen open to the living room (typically 8 to 10 feet of countertop) is ideal. Use a low bar or peninsula counter rather than a full wall, this maintains sightlines while offering seating and a subtle boundary.
When removing a wall, you’ll likely need a header (a horizontal beam) to carry the load above. For a short span (4–6 feet), a single 2×10 or 2×12 joist often suffices: wider openings require a doubled-up beam or engineered lumber like LVL (laminated veneer lumber). A structural engineer will specify the exact size based on load and span. This step is essential: a sagging or failed header is a safety hazard and costly to fix later.
Don’t remove every wall. One or two partial walls or archways create visual interest and prevent the entire interior from feeling like a box. Use these strategic dividers to define zones without isolating them. Modern tiny homes use home design inspiration from Dwell to showcase how subtle separations, a small step up, a change in flooring material, or an angled wall, carve distinct zones within an open layout.
Multifunctional Furniture and Built-In Solutions
In tight quarters, every piece of furniture must earn its place. A sofa that’s just a sofa is wasted real estate: one that converts to a bed or features storage underneath is gold.
Built-in solutions are the hallmark of tiny home design. A window seat with lift-up storage doubles as seating and a linen closet. Floating shelves above a desk eliminate the footprint of a filing cabinet. A bed with drawers underneath, rather than a nightstand next to it, saves floor space. Lofted sleeping areas over the living room are classic tiny home moves, though they require ceiling height of at least 6 feet 6 inches in the loft and clearance above the living space.
Wall-mounted fold-down desks, murphy beds, and nested tables are practical, but here’s the reality: they take discipline to manage daily. A murphy bed that’s harder to fold than opening a regular one won’t get used. Choose multifunctional pieces that feel natural to your routine, not novelties.
Budget for custom built-ins if possible, a carpenter or cabinet maker can design drawers, shelves, and cubbies that fit your exact footprint. Stock furniture rarely aligns perfectly with tiny home dimensions. A standard 36-inch-wide vanity might leave an awkward 2-foot gap: a custom 34-inch unit fits perfectly. Custom work costs more upfront but prevents wasted space and future regrets.
Smart Storage and Organization Systems
Storage failures are why tiny homes feel cramped. Clutter spills into living areas because there’s nowhere else to put things. Before selecting furniture or layout, map out storage zones.
Use vertical storage, floor to ceiling, wherever possible. Tall shelving units, cabinet columns, and wall-mounted racks keep clutter off the floor and maximize cubic footage. Drawers stack deeper than you might expect: a 24-inch-deep cabinet holds more than it appears from the front.
Categories matter. Designate zones: seasonal items go in overhead cabinets, daily-use tools and dishes in waist-height drawers, infrequently used items in corner carousels or pull-out organizers. Label everything. It sounds obvious, but when every inch counts, knowing exactly where something lives prevents frantic searching and redundant purchases.
Underbed storage is often overlooked. Plastic bins on wheels slide under a lofted bed or low-profile sofa, keeping off-season clothes, holiday decorations, or tools out of sight. A 6-foot bed can hold 4–5 rolling bins without crowding.
Don’t fight your layout’s quirks, use them. A sloped ceiling corner that’s too short for furniture? Wall-mounted shelving or tension rods for hanging clothes transform dead space into functional storage. Awkward nooks become pantries, charging stations, or reading corners with the right organizational inserts and lighting.
Lighting and Visual Space Enhancement
Lighting is the cheapest and most powerful way to make a tiny home feel larger. Bright, well-lit spaces feel open: dim, shadowy ones feel closed-in.
Maximize natural light first. Clean windows obsessively, dust and grime block more light than you’d think. If possible, avoid heavy curtains: use sheer roller shades or light-filtering blinds that let daylight in while maintaining privacy. For windows where privacy is critical, frosted film is a game-changer: it blocks views while preserving light.
For artificial lighting, use layered lighting: overhead ambient light, task lighting (desk lamps, under-cabinet strips), and accent lighting (wall sconces, LED strips). Avoid a single overhead fixture: it creates harsh shadows. Recessed ceiling lights, track lights, or flush mounts distribute light evenly without eating visual space.
Color and finishes expand perceived space. Light, neutral walls (whites, soft grays, warm beiges) reflect light and feel airy. Glossy or semi-gloss finishes bounce light around better than flat finishes. Dark accent walls work for one feature area but shouldn’t dominate.
Mirrors amplify light and create depth. A large mirror opposite a window bounces natural light across the room. Mirrored cabinet doors reflect light and hide clutter simultaneously. Just don’t overdo it, mirrors should feel intentional, not gimmicky. Interior designers often reference small space living strategies that cleverly use mirrors and lighting to open up compact layouts.
Creating Distinct Zones in Limited Square Footage
Even in an open layout, humans need psychological separation between work, sleep, and relaxation areas. Create zones through subtle boundaries.
Flooring transitions define spaces. A rug under the dining area, wood flooring in the kitchen, and carpet in the living zone signal different purposes without walls. A 2–3 inch step up to a sleeping loft clearly separates it. Paint accent walls or use wallpaper to anchor zones: a warm paint color in the bedroom corner feels cozier than extending white walls throughout.
Furniture placement creates invisible boundaries. A low sofa back facing the kitchen subtly divides it from the living area. A bookcase used as a room divider, rather than against a wall, creates a soft partition while displaying storage. Angling furniture slightly off the grid (not parallel to walls) makes the space feel more dynamic and less like a shoe box.
Ceiling treatments work in lofted homes. Lowering the ceiling height over a sleeping area with a soffit or keeping it high in living zones reinforces the distinction. A bedroom closet tucked under sloped rooflines uses awkward overhead space efficiently.
Acoustic zones matter too. A rug, curtains, and soft furnishings in the bedroom reduce sound transfer to the living area. In open kitchens, a range hood that vents outside (not recirculating) prevents cooking noise and odors from dominating the whole home. If one person works from home and another watches TV, even a partial wall or curtain rod with heavy panels provides acoustic separation.
Conclusion
Tiny home layout success hinges on three principles: understand your footprint and fixed elements, ruthlessly eliminate visual and physical clutter through smart storage, and create distinction through subtle zoning and lighting. Don’t jam in trendy multifunctional gadgets: invest in built-ins and layouts that support your actual daily routine. Start with measurements, a sketch, and honest conversations about how you live. A thoughtfully planned tiny home is livable, functional, and surprisingly comfortable, proof that square footage isn’t destiny.